
How To Use Docusaurus?
Docusaurus is a great open source solution to organizing and uploading your documentation online for others to see. Docusaurus uses Markdown files to create the documents. This was created my Meta and is under an MIT License. This is primarily used for projects to host there documentation, but many people use the software for other things. For example, this site was built with Docusaurus.
How to Download and Get Started?
Downloading Docusaurus is really easy if you follow these steps. You will also learn how to download it dependencies, and clone files from Github. This installation process will be coming from the Docusaurus Installation Guide itself, so make sure to review that for more information.
Downloading Dependencies
Dependencies: Before downloading anything you must check to see if you have Node.js 20.0 version or newer. To see if you have it downloaded, pull up a terminal, and type "node -v". This will show you the current version of Node.js that you have. If you have Node.js installed it should look like this:
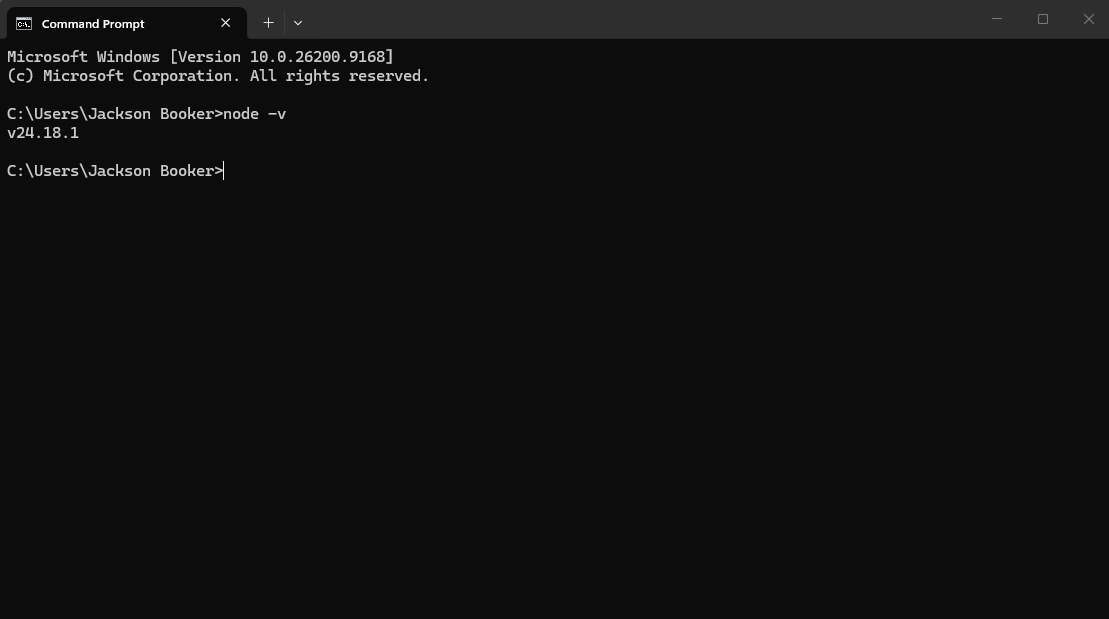
If you do not have it installed follow this Node.js installation. Once the dependencies are installed then you can move on to downloading the Docusaurus files and folder.
Cloning Docusaurus Files and Folders
Docusaurus has provided a "create-docusaurus" command line tool to help with the installation. You are going to want to type this into the same empty terminal.
npx create-docusaurus@latest my-website classic
For the "my-website" piece, you can change that to whatever you like. I my demonstration I am using "example-site". It should look like this:
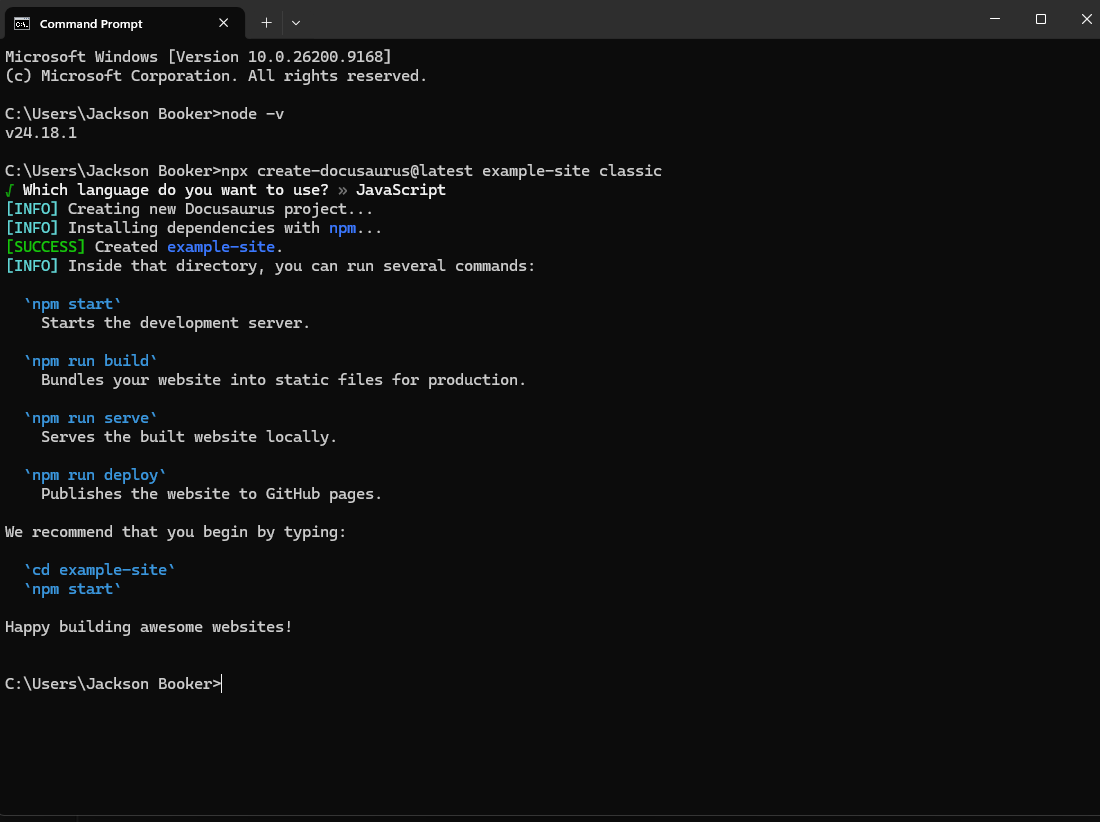
Once downloaded, you will need to find the folder on your computer. The path should be C:\Users\YOURNAME\YOURSITE. You can move your site to anywhere you want. I have personally moved my website to my "Documents" folder for easy use. If everything worked right then your folders should look like this:
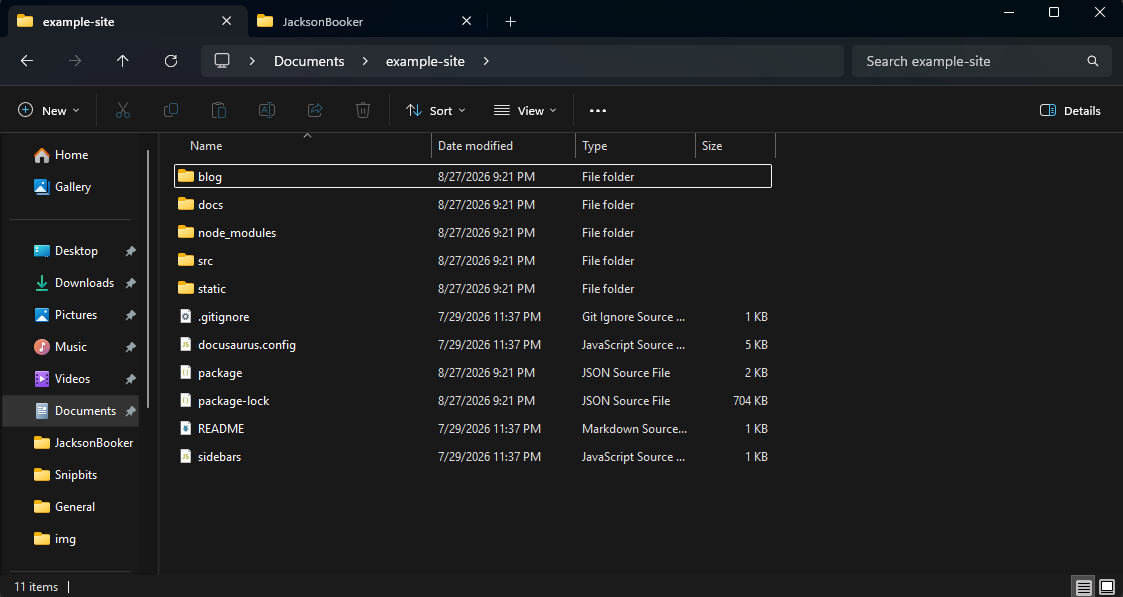
What Files Do I Need To Use?
The two places that you need to work in to customize your space is docusaurus.config.js file and the docs folder. Editing anything else is optional. For more information you can go to this Docusaurus Configuration Article. For the website customization, all you need is the docusaurus.config.js, and it is super easy to use. I like to open this file in Visual Studio Code, a code editor that many people often use, to make edits. When you open your config file, you can start editing the orange text. The green text is there for information on what to write and how to use. I strongly suggest reading through it before changing anything.
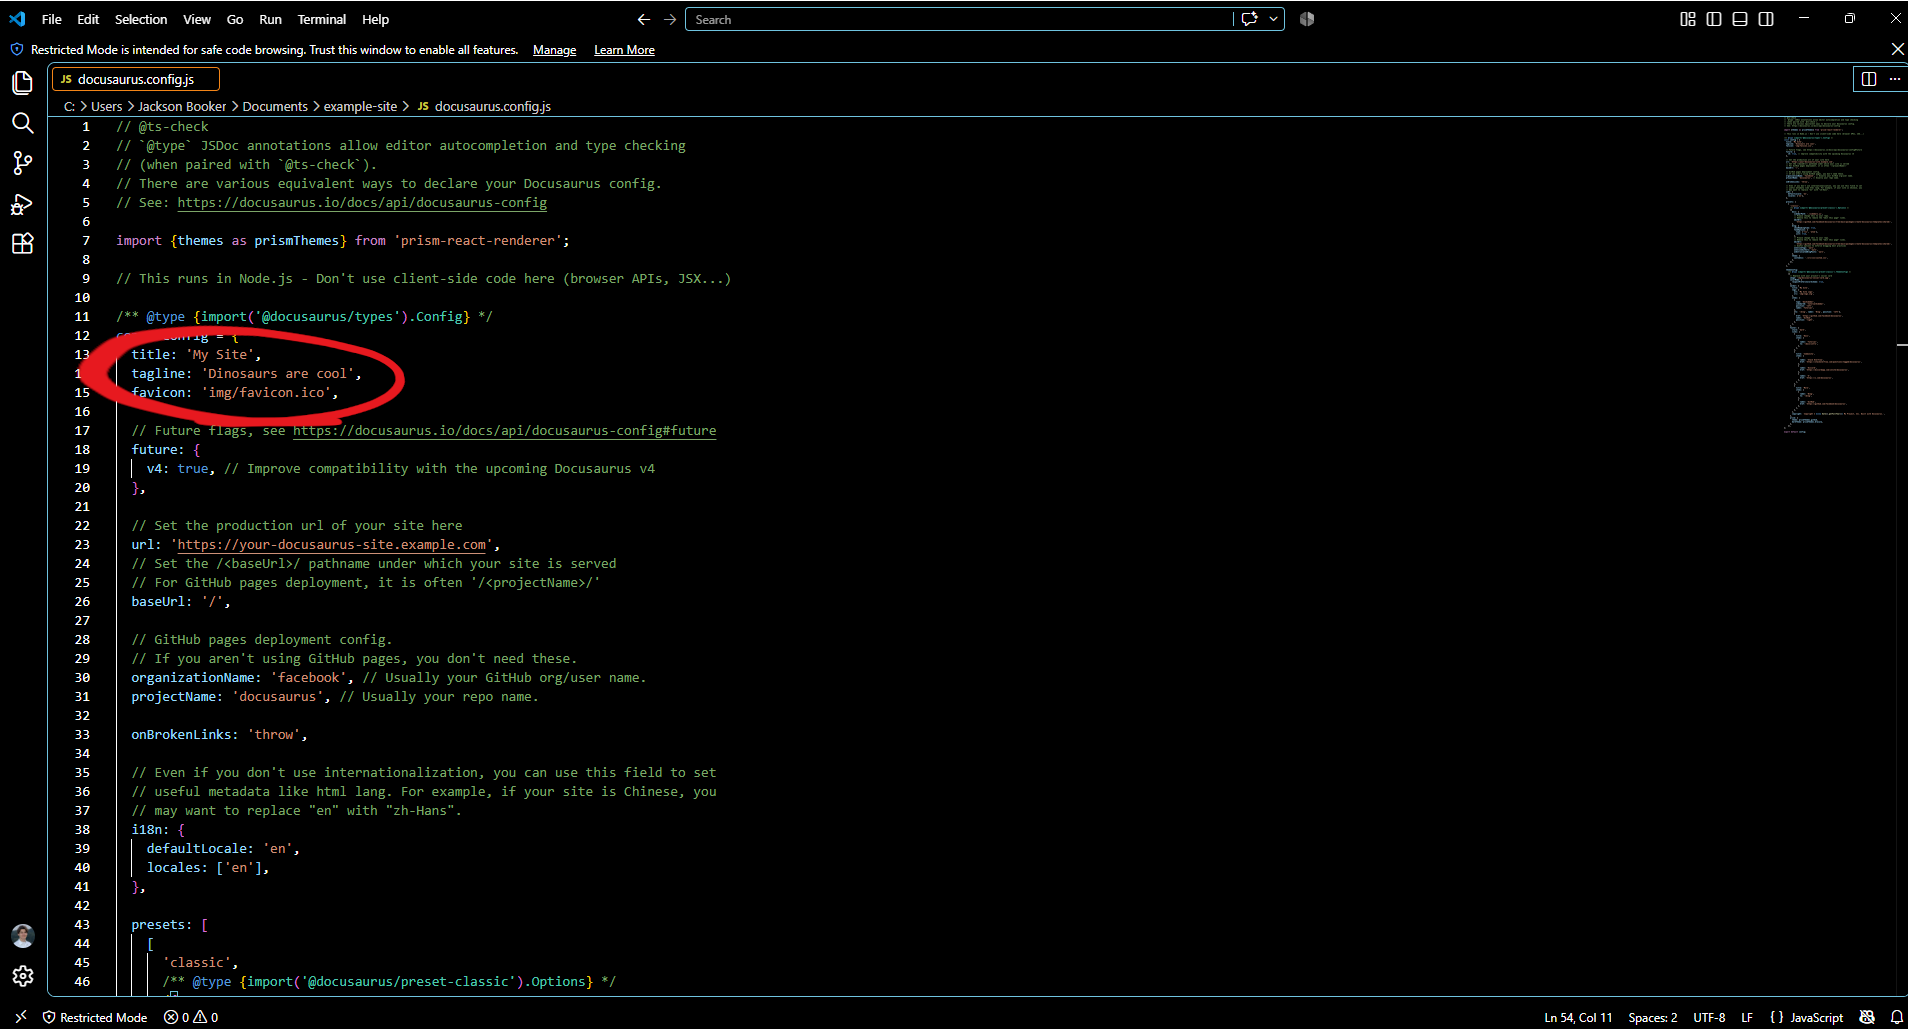
Once you change your the edit your information, you will have your personalized documentation website. The second item that you need to change is the docs folder. The docs folder is what holds all of your markdown files and turns them into the documents that you can see online. What I did is, I pointed Zettlr, a markdown editor, to my docs folder so I can edit the markdown files and folder. I explain a little about this in my other article, How To Write Good Documentation?
Of course there are other modifications you can do like changing all the colors by going to this path C:\Users\YOURNAME\Documents\example-site\src\css or adjusting your sidebars by going to sidebars.js, but Docusaurus provides detailed articles for you to figure that out.
How To Add KaTex To Your Files?
KaTex is a mathematical render-er so you can type math symbols and equations using your keyboard and have preview like a hand written equation. If you are not adding math, you can skip any part with KaTex in it.
To start, go to the KaTex Website that has more information and the install.
Using npm, you can install it using the command:
npm install katex
Adding KaTex to Your Config File
To add KaTex to your docusaurus.config.js file you must add three code blocks. This is coming from Docusaurus official documentation. The first one is this code block which you will add at the very top of your config file, right above const config = {:
import remarkMath from 'remark-math';
import rehypeKatex from 'rehype-katex';
This next one you will add under presets: [ and under docs:{:
          remarkPlugins: [remarkMath],
          rehypePlugins: [rehypeKatex],
The last one is the stylesheets which you will add as its own big block right about themeConfig:
  stylesheets: [
    {
      href: 'https://cdn.jsdelivr.net/npm/katex@0.13.24/dist/katex.min.css',
      type: 'text/css',
      integrity:
        'sha384-odtC+0UGzzFL/6PNoE8rX/SPcQDXBJ+uRepguP4QkPCm2LBxH3FA3y+fKSiJ+AmM',
      crossorigin: 'anonymous',
    },
  ],
Testing Your Files
When testing your site, you open your terminal, that is open in your folder. You can do this by writing "cmd" in your Docusaurus root folder. Once your in the terminal, type:
npm run start
This will run your site locally so that you can see how it looks in a browser. You can eventually add your site online for $10 a year, and with a custom domain by following my other article that I wrote called How To Get Free Hosting For Docusaurus?
Troubleshooting
Initially, when I ran npm run build I would get an error because of broken links. I figured out that in the docusaurus.config.js file that I need to adjust the code from,
onBrokenLinks: 'throw',
to
onBrokenLinks: 'ignore',
for the site to build correctly.